When creating applications for the web, it can be easy to become muddled in the terminology, constraints and learning curve of using a framework designed to make the development flow easier. For example, frameworks such as Angular and React can add unneeded cognitive overhead and it can be difficult for beginners to understand what exactly is going on during the build process. It is crucial to understand not only what is happening during development but also once your application has been built for a production environment.
Progressive Web Applications are built to be installed on various devices, typically mobile, and are supposed to provide a seamless and native-like experience. However, a web application only becomes installable once a set of criteria are met.
In this tutorial, I will outline the minimal requirements needed to create a working progressive web application without the use of any frameworks. We will be using Google Lighthouse’s auditing tool as a point of reference.
It’s Just HTML, JS and CSS
Particularly with inexperienced developers, adding pre-processing and template languages such as Pug, Typescript and SCSS can cause extra levels on confusing and unneeded complexity. By the time your application is served in a production environment, chances are that those languages have been compiled into HTML, JS and CSS and that’s ALL it is! None of those will be used in this example.
Directory Structure
As we won’t be using any framework or preprocessing tools, we want to set up our directory so that it represents what it will look like on the server. In this example, we will use a single HTML file as our main view which will be located in our public directory.
$ mkdir public
$ cd public
$ touch index.html
Now, we can add our boilerplate html
<html>
  <head></head>
  <body></body>
</html>
As a standard, we need to add the doctype annotation to the page. This goes before the opening HTML tag
<!DOCTYPE html>Next, we should define the initial language for the page. In the opening HTML tag…
<html lang="en">
  ...
</html>
In this case, the language is set to English.
Finally, add a couple of text elements so something is visible on the page.
<body>
  <h1>Welcome</h1>
  <p>Welcome to this example progressive web application</p>
</body>
Meta Tags
Meta tags are used by the browser to configure various settings pertaining to the document content. They are defined inside a meta tag and typically contain two attributes, name (used to identify the meta data type) and content (used to determine the configuration). They are added between the head tags of the document.
Encoding
Immediately we can add a meta tag to describe the encoding for our document.
<meta charset="utf-8" />Responsive Viewport
We can also add a viewport tag that describes the initial scaling of the page content. This will allow the document to adhere to the dimensions of the device is is being displayed on.
<meta name="viewport" content="width=device-width, initial-scale=1" />Theme Color
A theme color meta tag can be used to provide a theme color for the application when viewed on certain devices. For example, adding the following tag adds a green color to the Chrome mobile navigation bar on Android OS.
<meta name="theme-color" content="#10c15c" />Note that this color can be set to any valid CSS color.
Favicon
While the favicon isn’t included as a meta tag, it does go hand in hand with aiding the presentation of the site. A favicon is used as the site’s icon that is displayed on its tab in a browser.
Add a favicon to the public directory and link it in the following way…
<link rel="icon" type="image/x-icon" href="favicon.ico" />Base Href
Another non-meta tag that is important for correctly deploying a PWA is the base tag. This describes the starting url of the application and subsequent routes will be appended to this. This application will be available from www.{domain-name}.com so our base URL is /.
<base href="/" />Becoming Discoverable
Before adding any styling, JavaScript or content to our site, there is plenty that can be done to satisfy Lighthouse in our index page alone. To ensure that a page is discoverable by search engine crawlers, we can use certain tags to describe the site. We can add a title to our page that is used by browsers to decorate tabs and windows with the application name and we can use a meta tag to provide a description.
<head>
  ...
  <title>PWA Example Application</title>
  <meta name="Description" content="A PWA Example" />
  ...
</head>
Now to actually become discoverable by search engines, we need to let crawlers know about the content of the site. This is done using a robots.txt file. This should be in the same directory as the index page.
$ cd public
$ touch robots.txt
The robots.txt file is used to describe rules for crawlers, such as which robots can crawl and which pages to visit / not visit. Our robots file will be defined as follows.
User-agent: *
Allow: /
Here, any robots are allowed to crawl our site and have access to all pages. There is no need to include a reference to the robots file as it should and will be available during production at www.{domain-name}.com/robots.txt. It will be the server’s responsibility to ensure this is served.
Accessibility – No JavaScript
Sites that use JavaScript are required by Lighthouse Audits to still show some sort of meaningful content in the event that the user has disabled the running of scripts for whatever reason. This is the first item that will be added to the body of the index page.
<noscript>Please Enable JavaScript To Continue Using This Site</noscript>Of course, if JavaScript is not totally required to use the site, this could be something meaningful to prompt the user to enable scripts.
Installable – manifest.json
To allow our PWA to be installed onto devices, we must provide a manifest.json that is used to define its application settings once installed on a device.
$ cd public
$ touch manifest.json
Now let’s add some basic settings.
{
  "name": "PWA Example",
  "short_name": "PWA Ex",
  "theme_color": "#10c15c",
  "background_color": "#ffffff",
  "display": "standalone",
  "scope": ".",
  "start_url": ".",
  "icons": []
}
A breakdown of this configuration is as follows…
name – The name of our web app.
short_name – Used when the full name can’t be used, for example, Android OS icons.
theme_color – The theme color of the app – typically a good idea to set this to the same as the theme color used for the theme-color meta tag.
background_color – The background color of the splash screen that shows when the app is launched.
display – How the app will be displayed on the device once installed. In this case, "standalone" is used, which makes the app full screen and feel more like a native app.
scope – Used to describe the scope of your app and what the application considers to be “within” your application. This application won’t be scoped so we used "." to capture the whole domain.
start_url – Provides the application with information about which screen is the initial screen within your application. Our index page is our landing page so we can start from our root directory.
icons – While we have not currently defined our icons, this is where they will be added so that the application uses them once installed.
Manifest Icons
Manifest icons are used to define a set of icons for the device to use when showing the application on the home screen, app launcher, task switcher and its own splash-screen. These icons are to be included in a range of sizes so that they retain quality across all device sizes. Fortunately, Chrome only requires that we include 2 sizes; a 192x192px and a 512x512px that will be scaled accordingly. First we’ll add a directory that will house these icons.
$ cd public
$ mkdir assets
$ cd assets
$ mkdir icons
Now we can put our assets icons in this directory which is found at /assets/icons.
{
  "icons": [
    {
      "src": "/assets/icons/icon-192.png",
      "type": "image/png",
      "sizes": "192x192"
    },
    {
      "src": "/assets/icons/icon-512.png",
      "type": "image/png",
      "sizes": "512x512"
    }
  ]
}
Service Worker
Now that the behaviour of the installed application has been defined, it now needs to actually become installable. By installable, that means gathering all required assets for availability offline. To achieve this, a service worker is used to process, cache and retrieve all required assets.
Adoption of the service worker API is pretty wide but it is still wise to check if the browser supports it before trying to access it. To do this, we will first add a couple of JavaScript files into our public directory.
$ cd public
$ touch app.js
$ touch service-worker.js
Next, add the app.js JavaScript file to our index page at the bottom of the body.
<body>
  ...
  <script type="text/javascript" src="app.js"></script>
</body>
With this file included, the site is now ready to start running JavaScript and checking if the browser supports service workers.
Open app.js and add the following.
if ("serviceWorker" in navigator) {
  /**
   * If we got this far, the browser supports service workers!
   * The next thing to do is to actually register our service worker.
   */
  navigator.serviceWorker
    .register("/service-worker.js") // Provide the path to the service worker
    .then(registration => {
      // Once the registration is successful...
      console.log("Service Worker Registered Successfully!");
    })
    .catch(error => {
      // Otherwise...
      console.log(
        "Service Worker Failed To Register With The Following Error: ",
        error
      );
    });
}
Now, provided the browser supports it, a service worker will have been successfully registered, that is, once we’ve implemented the actual service worker.
The service worker will listen and respond to events in the browser. The first that we will be interested in is "install". This is fired once the user has decided to install the application on their device. This is the best time to gather all required assets needed to allow the app to run offline. Thankfully, we are not including a massive amount of assets.
Open service-worker.js and add the following.
/**
 * A name for the cache which will also be used when retrieving cached assets.
 * It is sensible to name your cache with a version number.
 */
var CACHE_NAME = "v1";

/**
 * Array of assets that are to be cached
 */
var ASSETS = ["/index.html", "/app.js"];

/**
 * Listen for the `install` event.
 */
self.addEventListener("install", event => {
  /**
   * Now the event has been fired, cache all required assets.
   */
  event.waitUntil(
    /**
     * Add the assets to the cache
     */
    caches.open(CACHE_NAME).then(cache => {
      return cache.addAll(ASSETS);
    })
  );
});
Now the service worker will respond to "install" events and caches the required assets during installation and is ready to manage offline requests.
Once the service worker has been installed, it will "activate" and can now be used to fetch assets either from the cache or remotely.
self.addEventListener("activate", event => {
  console.log("Service Worker Activated!");
  /**
   * Service worker is now ready to handle fetch requests
   */
});
Finally, offline capability can be added so that if the device is offline, assets can still be loaded from the cache but can be retrieved remotely once connection is restored. In this case, we want to serve our single page whether or not an internet connection is available.
/**
 * The view to be used if there is no network connection.
 * This can be changed to something like offline.html for example to show a dedicated offline view.
 */
var OFFLINE_PAGE = "index.html";

/**
 * Listen for the fetch event
 */
self.addEventListener("fetch", event => {
  if (event.request.method === "GET") {
    /**
     * A GET request is typically retrieving assets from a remote location.
     * In this case, we should check the cache to see if this asset exists and then
     * check to see if a live version can be fetched.
     */
    event.respondWith(
      // Check the cache first
      caches.match(event.request).then(cached => {
        // Whether or not the resource was found, check for a remote version it.
        var networked = fetch(event.request)
          .then(res => {
            // If successful, add this newer version of the asset to the cache
            var response = res.clone();

            caches
              .open(CACHE_NAME)
              .then(cache => cache.put(event.request, response));

            return res;
          })
          /**
           * In the event that the assets couldn't be retrieved from the cache and there
           * was no internet connection, serve the offline page.
           */
          .catch(() => caches.match(OFFLINE_PAGE));

        return cached || networked;
      })
    );
  }
});
Now our application is installable and available offline!
Bonus Round – Deployment
If we spent this time building our application, we might as well work towards having it deployed in a production environment. We will work towards creating an Express server to serve our application. This requires a few prerequisites.
Head over to Heroku and create an account there. Do not worry, you can create an account for free and you’ll still be able to access all the features we need.
Node and NPM will be required on your development machine as we will be using Node packages to create our server.
Git will be used as our source control tool and is needed to integrate with Heroku CLI.
Create Heroku App
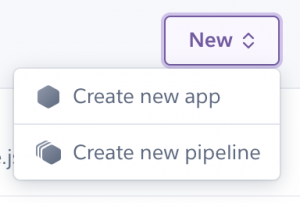
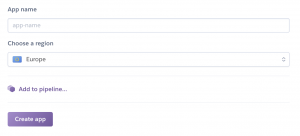
First, log in to your Heroku dashboard and create a new app.
Once created, navigate to the “Deploy” tab and choose “Heroku Git” as the deployment method.

Follow the instructions below on how to install the Heroku CLI. Once installed, log in to Heroku via the CLI.
$ heroku loginThis should prompt you to press any button to open a browser window, log you in and return you to your IDE.
Next, initialise a Git repository here in the root of your application.
$ git initNow we can add our remote deployment location by using the app name provided by Heroku.
$ heroku git:remote -a pwa-exampleNow we are set up to push once we are ready to deploy.
Express Server
Before we can create our server, we will require a few external libraries from NPM. Start by initialising your project.
$ npm initYou will be prompted to answer a few questions about your project before a package.json file is created in the directory. If you don’t understand what any of these questions are asking, don’t worry, just press enter and skip through them. In essence your generated package.json should look similar to this.
{
  "name": "pwa-example",
  "version": "1.0.0",
  "description": "An Example PWA",
  "scripts": {},
  "author": "Ben Brookes",
  "license": "ISC"
}
Now we can add Express to our project.
$ npm i express --saveTo further satisfy Lighthouse Audits, the running server needs to be as quick as possible when serving content. To do this, we can compress assets before they are served using a compression library.
$ npm i compression --saveIn the root of the project, another directory will be created that will house our server logic.
$ mkdir server
$ cd server
$ touch index.js
server/index.js is where we can begin to write our server logic.
// Used to serve our application
const express = require("express");
// HTTP server utilities - Built-in
const path = require("http");
// Used to resolve directory paths - Built-in
const path = require("path");

/**
 * If the environment variable has specified PORT as a different value, use that
 * otherwise use 8080.
 */
const port = process.env.PORT || 8080;

// Create the Express application
const app = express():

// Create a http server and pass our application to it.
const server = http.Server(app);

// Make our app use compression
app.use(require("compression")());

// Serve static assets from the public directory
app.use("/", express.static('public'));

// Anything else, serve the index page.
app.get("/*", (req, res) => {
  res.sendFile(path.resolve("public/index.html"));
})

// Finally, run the server ad listen for requests
server.listen(port, () => console.log(`App listening on port ${port}`));
HTTPS Redirects
For our application to be considered a PWA and be installable, it absolutely must be served over HTTPS and must redirect to the secure equivalent if anything is accessed via standard HTTP. Thankfully, a custom piece of middleware can be used to do this.
$ cd server
$ mkdir middleware
$ cd middleware
$ touch https-redirect.js
Heroku uses the `X-Forwarded-Proto` header to help identify the protocol used when accessing its applications. It is possible to check what the protocol was and if it was not secure, redirect the client to the same URL using the secure protocol. Open https-redirect.js…
module.exports = (req, res, next) => {
  /**
   * Only redirect to HTTPS if in the production
   * environment.
   */
  if (process.env.NODE_ENV === "production") {
    /**
     * We can rely on this header always being present while
     * deployed via Heroku, so check to see if the protocol was secure
     */
    if (req.headers["x-forwarded-proto"] != "https") {
      /**
       * Not using HTTPS
       * Redirect to the same URL using HTTPS
       */
      return res.redirect(`https://${req.headers.host}${req.url}`);
    } else {
      // Was served securely already, next...
      return next();
    }
  } else {
    // Not in a production environment, next..
    return next();
  }
};
Now we can make our Express server use this middleware. In server/index.js…
...

app.use(require("compression")());
// Add middleware here
app.use(require("./middleware/https-redirect"));

...
Now our application is set to redirect non-secure requests to HTTPS.
Heroku Deployment
Before deploying, some extra bits are required to aid Heroku in serving the application correctly.
To let Heroku know what engines are required to build and deploy open package.json and add the following.
{
  ...
  "engines": {
    "node": "9.5.0",
    "npm": "6.0.1"
  }
  ...
}
We also need to add a run script to start the server. Also in package.json…
{
  ...
  "scripts": {
    "start": "node server"
  }
  ...
}
This will run Node in the server directory.
Lastly, we can add a Heroku specific configuration file that describes how the application should be started.
$ touch ProcfileThis file will tell Heroku, for web processes, run node server.
web: node serverNow we can push to Heroku.
$ git add .
$ git commit -am "Heroku Deployment"
$ git push heroku master
If successful, you’ll be informed that your application is available at {app-name}.heroku-app.com. Navigate to that URL in the browser and ensure you’re live!